2002 Jeep Liberty Valve Seat Repair and Double Engine Head Rebuild
Project Abstract
In June 2022, my 2002 Jeep Liberty dropped a valve seat on the 4th cylinder intake valve. The problem was diagnosed using an endoscope inserted into the cylinder with the spark plug removed. The resulting repair project consisted of a full rebuild of both cylinder heads. I also took the opportunity to replace and service a number of other components subject to wear and tear since these components were made accessible during the removal of the cylinder heads. The repair and maintenance work included the following:
Removal and cleaning of the air intake system
Removal and cleaning of the front end (Accessory Belt, Tensioner Pulley, Alternator, Power Steering Pump, Water Pump, Harmonic Balancer, A/C Compressor)
Removal of Timing Chain Cover, Timing Chain, Sprockets and Tensioners
Removal, cleaning and disassembly of cylinder heads
Resurfacing and Rebuild of cylinder heads with all new components (Outsourced to local machine shop)
Upgrade of intake valve seats
Replacement of all gaskets, o-rings and coolant hoses
Replacement of Timing Chain and Tensioners
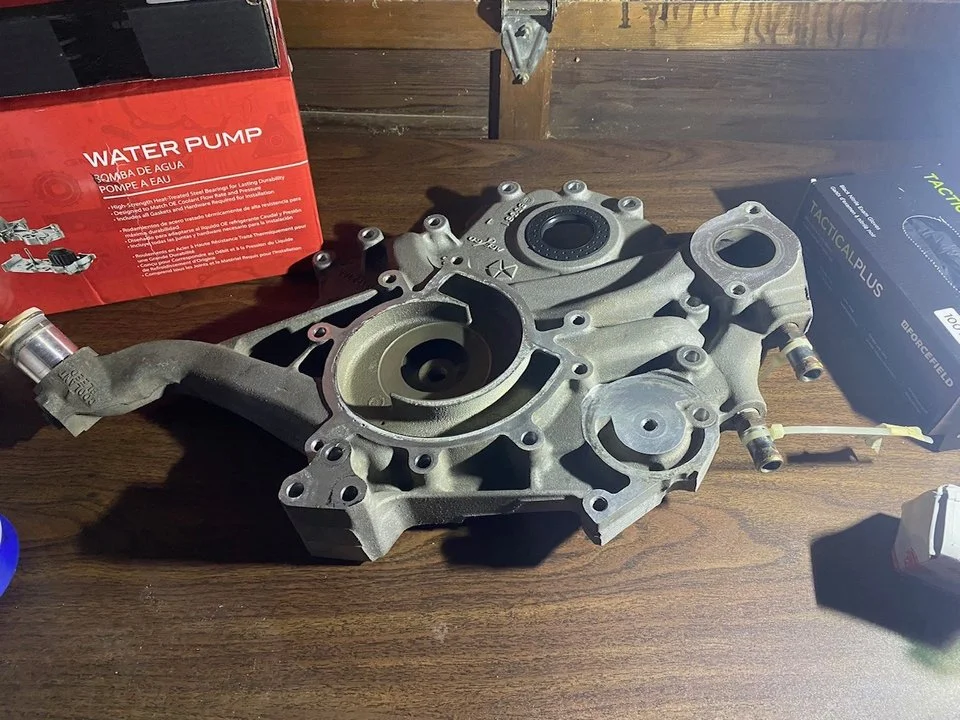
Replacement of Water Pump
Replacement of Harmonic Balancer
The result of this repair job was an engine that operates smoothly without misfiring or throwing engine codes. The total cost of the repair was approximately $2,000.00.

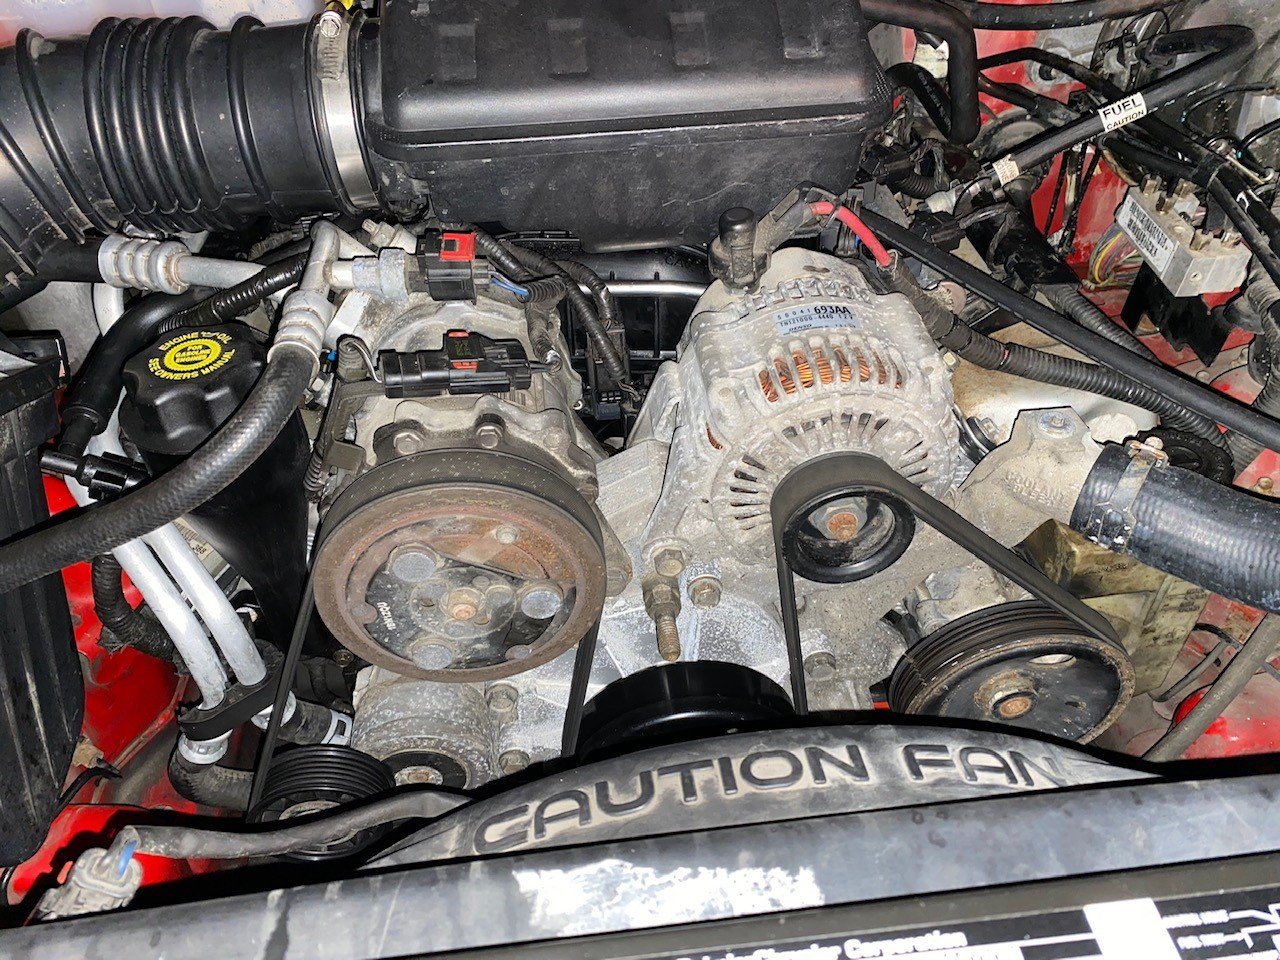
The engine before maintenance with the air box removed.
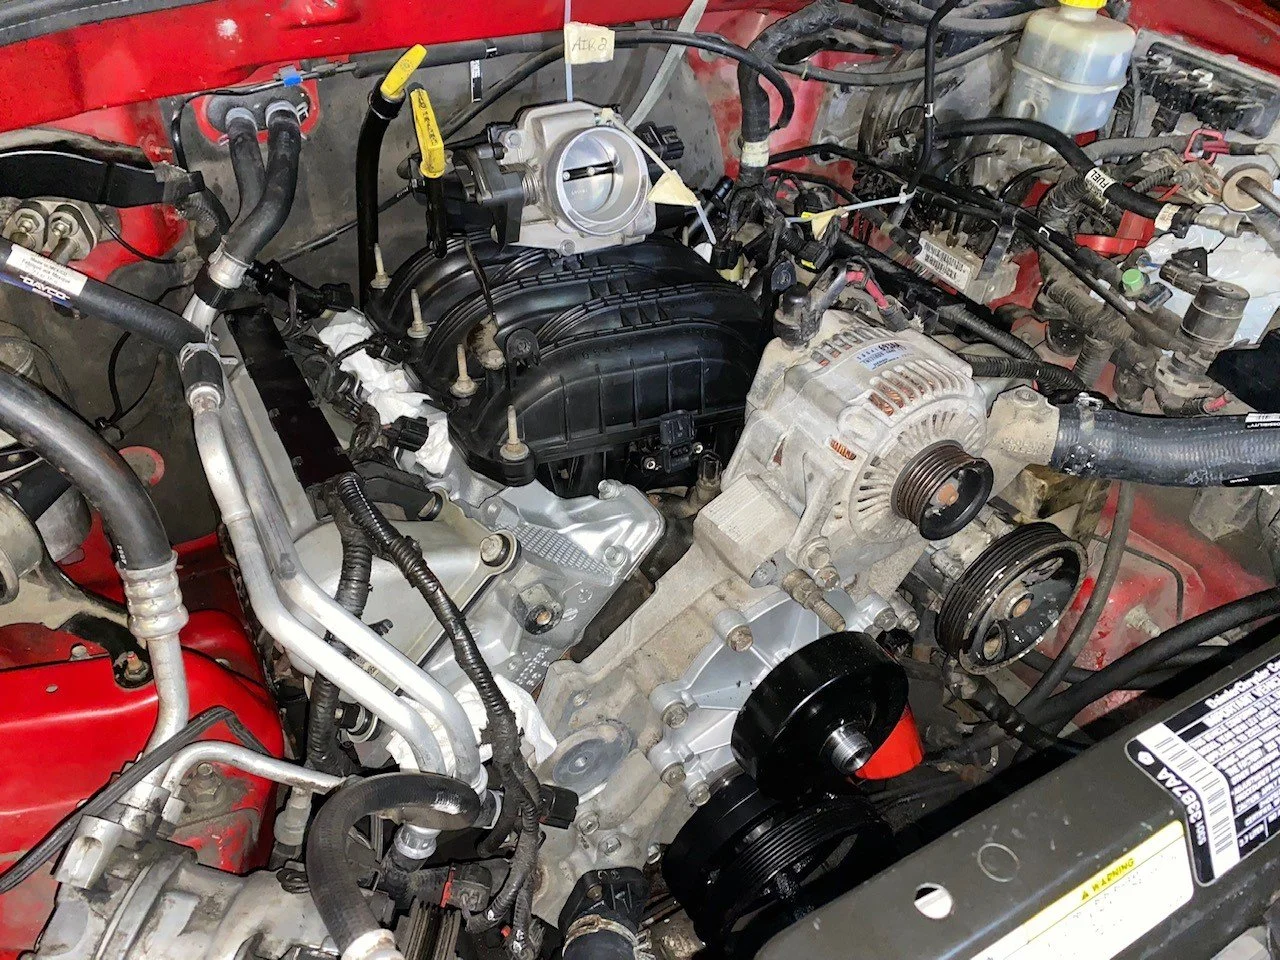
The engine after maintenance and repair work with new and cleaned/re-used parts installed.
(Not shown: A/C Pump, Tensioner Pulley, Accessory Drive Belt)
Diagnosing the Problem
Signs and Symptoms of the problem included,
Out of range O2 sensor readings
Engine stalling with the throttle closed
Engine revving up and down repeatedly at idle
Misfires on cylinder 4
Mild clanking noises
Each of these were addressed in order of discovery. The O2 sensors were replaced due to the out of range readings given by the old sensors which indicated that they were at end of life. A stethoscope was used to confirm fuel flow to the injectors, therefore, a problem with air flow to the engine during idling was suspected. The idle air control (IAC) valve was found to be gummed up with grease and debris and was replaced. After these component replacements, misfires on cylinder 4 coupled with mild clanking noises were detected. A compression test found that cylinder 4 could not maintain pressure and an endoscope inspection revealed that the intake valve seat had dropped.
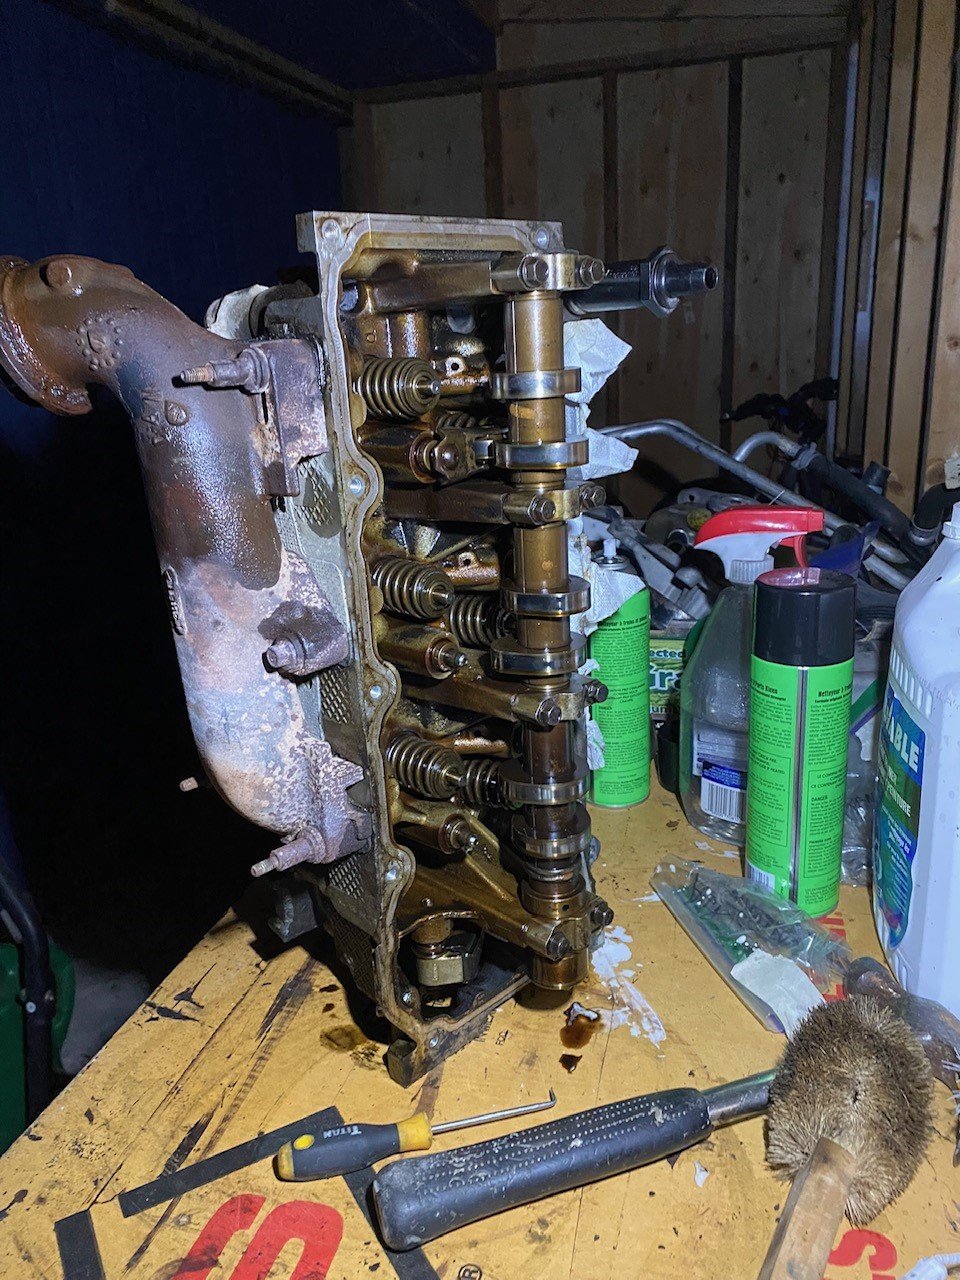
Cylinder head extracted from 2002 Jeep Liberty.
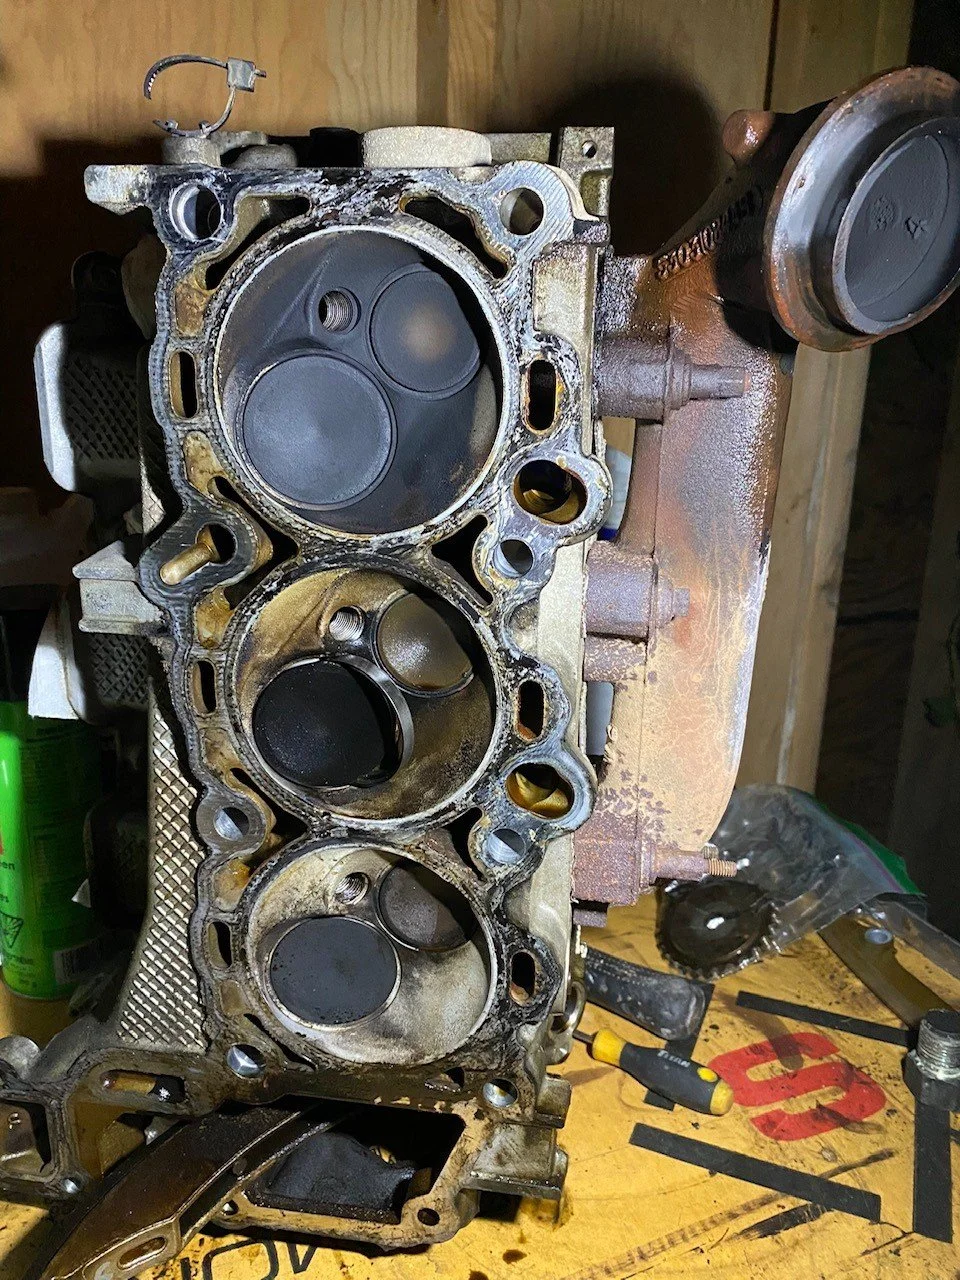
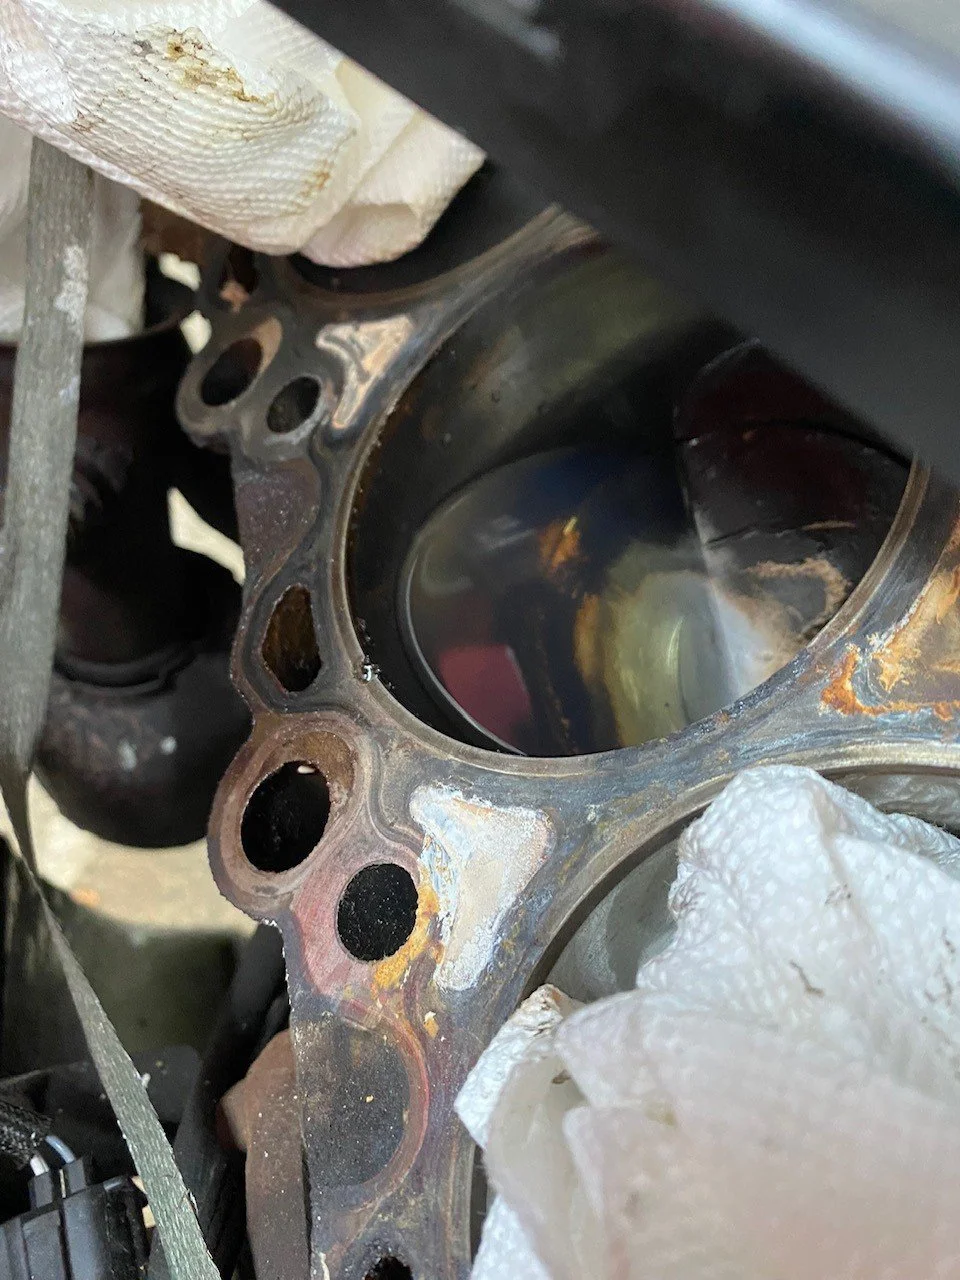
The passenger side cylinder head showing the dropped valve seat on cylinder 4.
Further Assessment on Disassembly
Upon disassembly of the engine to remove the heads, the following issues were noted:
Gaskets in poor condition and in some cases disintegrating
Blackened head gasket suggestive of an overheating event
Minor corrosion on components of the coolant system
Minor damage to the piston head in cylinder 4
All old gaskets were removed from the engine block and residue was scraped off of the engine block with a scraper tool. Coolant system hoses were replaced and corrosion was sanded out or scraped off. The damage to the piston head due to impact with the dropped valve seat was found to be minimal and only required the smoothing of any sharp corners in the scratch to remove stress concentration areas. Additionally, cylinder 4 was leak tested with gasoline to ensure that the piston ring was still forming a seal with the cylinder sleeve.

The scratch found on cylinder 4 as a result of piston contact with the dropped valve seat (Dimensions: L29.35mm X W4.81mm X D0.4mm)
Testing cylinder 4 for leaks with gasoline to ensure that the piston ring was still in good condition
Rebuilding the Cylinder Heads
Since the intake valve seat dropping on cylinder 4 was likely due to an overheating event, the cylinder heads needed to be resurfaced to ensure the surfaces that the gasket makes contact with were flat. Furthermore, I had both cylinder heads rebuilt with new components because there was over 240,000km on the old ones.
Dropping intake valve seats is a known issue with the 6 cylinder Chrysler PowerTech engine used in the 2002 Jeep Liberty and was resolved by re-machining the cuts for the intake valve seats and using a different valve seat with more depth and outer diameter in order to obtain a tighter press fit. The replacement valve seat was also made of stellite, a material which more closely matched the thermal expansion/contraction properties of the cylinder heads.

Cleaned, resurfaced and rebuilt cylinder heads.
All parts to be re-used were cleaned with industrial strength biodegradable degreaser and all gaskets, seals and o-rings were replaced.
Installing the Cylinder Heads and Timing Chain
The camshafts were installed without the camshaft sprockets when the cylinder heads were received from the machine shop and the cylinder heads and new head gaskets were installed on the engine block.
The timing chain and tensioners also required replacement as per the maintenance schedule. To install the timing chain, the timing chains and idler sprocket were assembled outside the engine with zip ties holding the parts of the chain to ensure that the specified links remained lined up with the marked teeth on the idler sprocket. The timing chains, idler sprocket and crank shaft sprocket were then installed as a unit. The timing chain for each side of the engine was lined up appropriately with the marked tooth on each camshaft sprocket and the cam shaft sprockets were moved into position and bolted to the camshaft while maintaining the position of the chain, ensuring that the engine was at Top Dead Center (TDC).
After the timing chain was installed, the timing cover was bolted in place with new gaskets and RTV sealant. The new water pump and crank shaft seal were installed while the timing cover was removed from the engine. Next, the valve covers were installed with new valve cover gaskets and grommets.
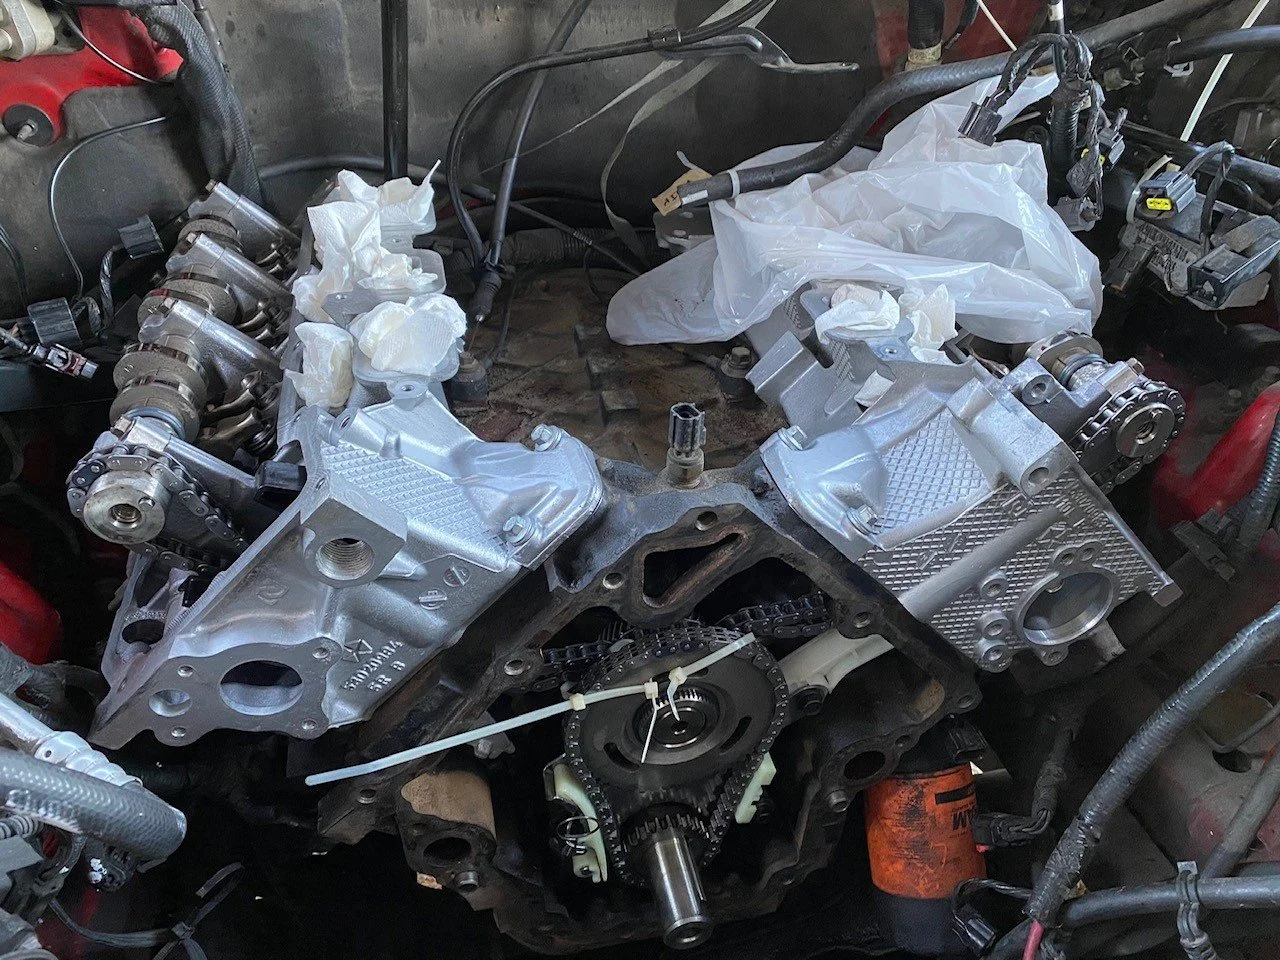
Timing chain installation showing zip ties holding the chains in place on the idler sprocket.

Fully installed timing chain.
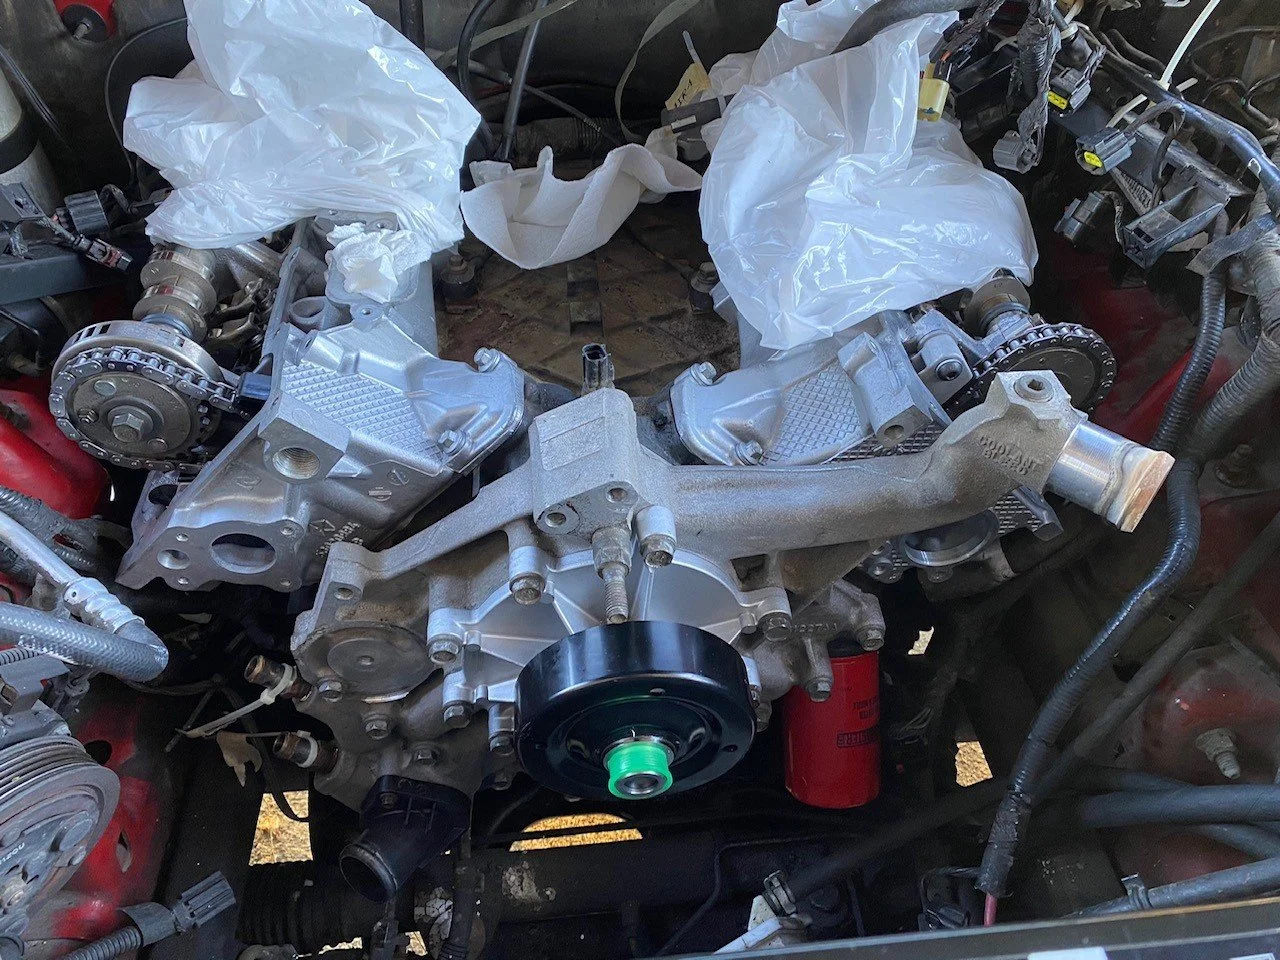
Installation of the timing cover/water pump assembly.

Installation of the valve covers and valve cover gaskets.