
Thermoforming Line PET Clamshell Counter
Project Abstract
As an Engineering Assistant at Packright Manufacturing, my main responsibility was addressing issues of inefficiency on the factory floor. The President and VP of Operations at the company approached me with a the problem of counting nested PET clamshells for the purpose of dividing the output of the thermoforming machines into stacks that would be packed into boxes. Previous methods included
Dividing the clamshells into stacks by length
Dividing the clamshells into stacks by weight
Counting the clamshells by hand
These methods were either inaccurate due to variations in material thickness or time consuming and labour intensive. The objective of the Thermoforming Line PET Clamshell Counter was to provide an accurate count of nested PET clamshells while reducing the labour involved in the counting process. Ultimately, I produced a device that counted nested PET clamshells with 98% accuracy and reduced the labour required such that factory workers only needed to slide the clamshells through the device and execute a button press.

A comprehensive functional prototype of the Thermoforming Line PET Clamshell Counter mounted on the thermoforming at Packright Manufacturing.
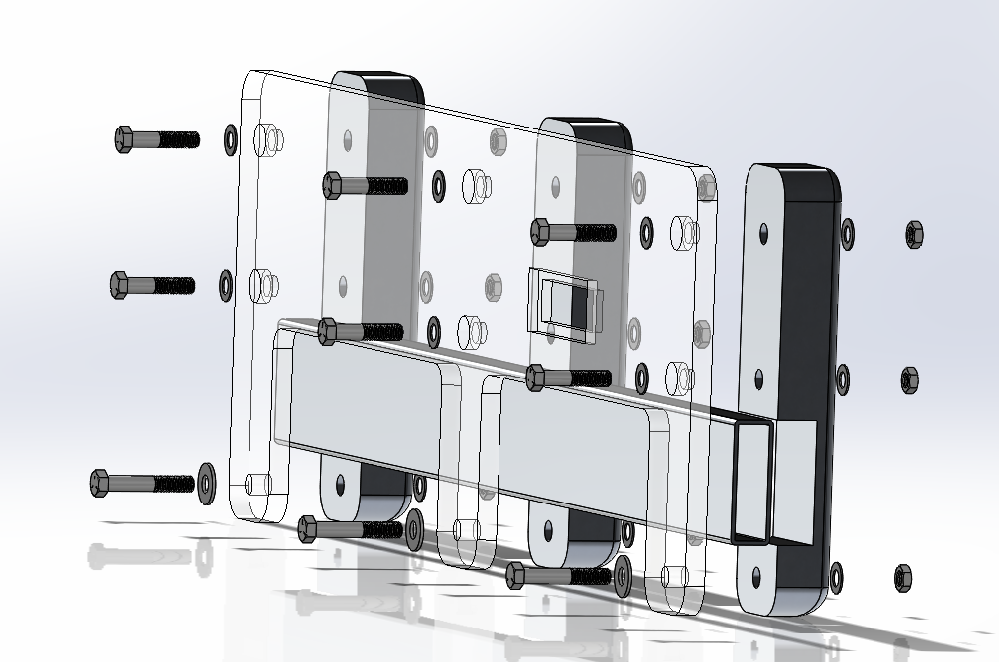
An exploded view of the mounting mechanism used to clamp the device to the thermoforming machine.
Design Requirements & Brainstorming
The design requirements were determined via interview with stakeholders and are listed below.
The device must count clamshells accurately
The device must accommodate different part sizes
The device must be easy to operate
The device must easily integrate with existing production systems
The device must be durable
From the requirements above, I determined the top level device functions and generated concepts to fulfill those functions. The top level functions are listed below.
Count/Detect clamshells
Keep track of clamshell count
Accommodate different part sizes
Give feedback to user
Accept user input
Separate stacks
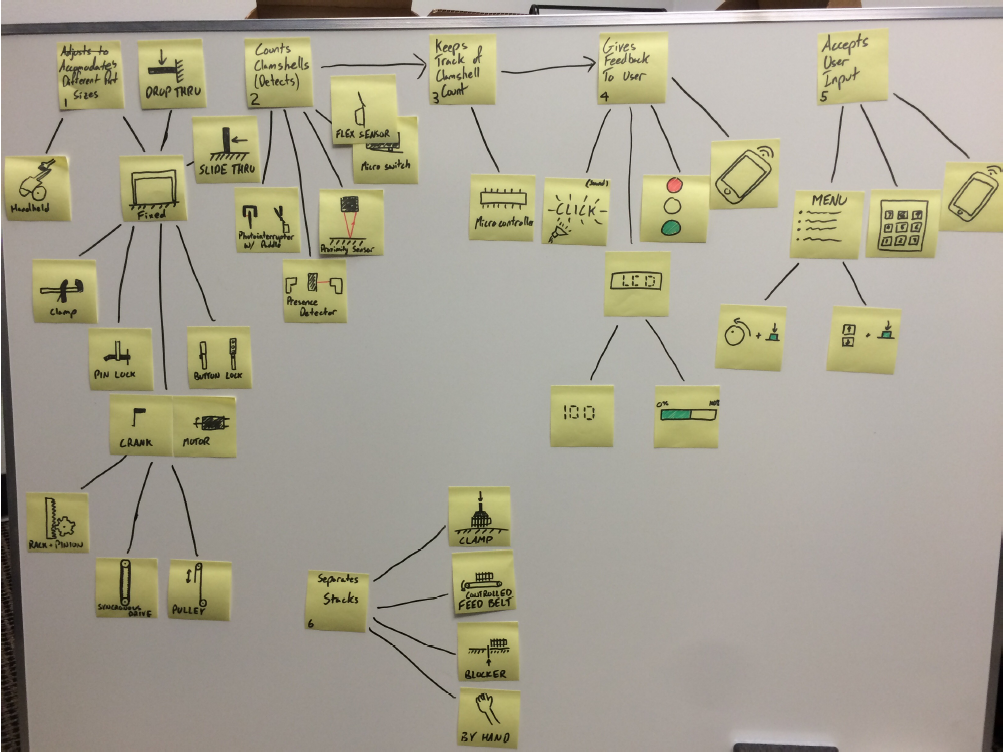
Brainstorming conceptual solutions for top level functions.
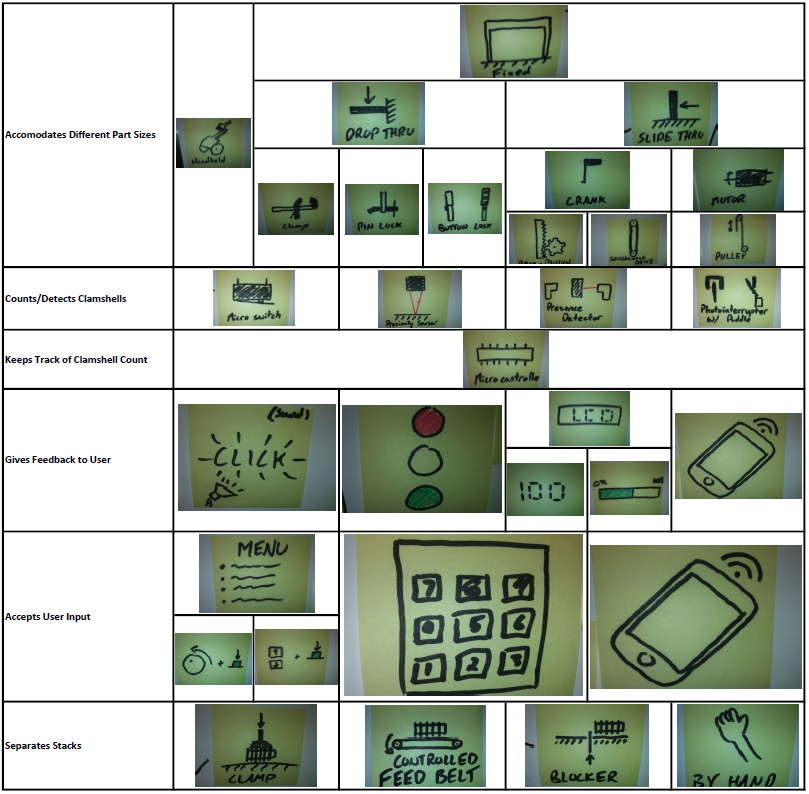
A morphological chart used to combine concept fragments.
Key Design Elements
Sensing
Three conceptual solutions for detecting and counting the PET clamshells were tested.
Microswitch
Flex sensor
Solid-state piezoelectric switch
Microswitches were eliminated as a solution for this application due to accuracy and durability concerns. The flex sensor was eliminated as a solution due to complexity factors and the need for a custom PCB which significantly increased the cost. The best sensing solution for this application was found to be the sold-state piezoelectric switch due to it’s durability (accidently moving the clamshells in the wrong direction would not break the sensor), accuracy (98% for nested clamshell stacks), and form factor (the SS piezoelectric switch included integrated circuitry that made for simple wiring and programming on my end).
Table Mounting
The table mounting mechanism was a key component in ensuring that the device was able to integrate with existing machinery while being ergonomically pleasing to use. The mounting mechanism was designed such that it could be clamped to the existing thermoforming machines and provide an upright surface to help factory workers keep PET clamshells aligned with the sensing module. The height of the upright surface was a key detail as it had to be high enough to align the largest clamshells but so high as to result in discomfort or awkward reaching during operation.
Push Jig
The push jig aids in keeping PET clamshells aligned with the upright surface of the table mount in order to ensure an accurate count. It uses the elasticity of a plastic material, such as UHMW PE, to apply a slight force to stacks of clamshells as they are passed through the device.
Electronics Housing
The housing for the electrical components on the prototype is made from a scrapped PET clamshell and contains the Raspberry Pi Zero and the button used to reset the count on the device. The housing for the screen is 3D printed PLA with an acrylic cover to protect the screen from damage.
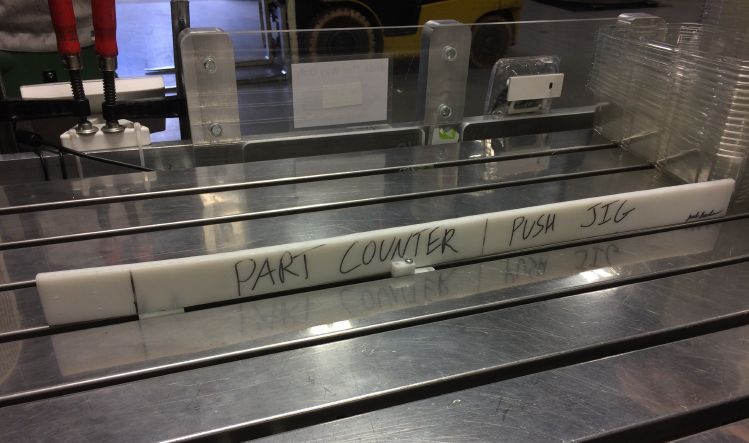
The prototype Push Jig used to assist with clamshell stack alignment.
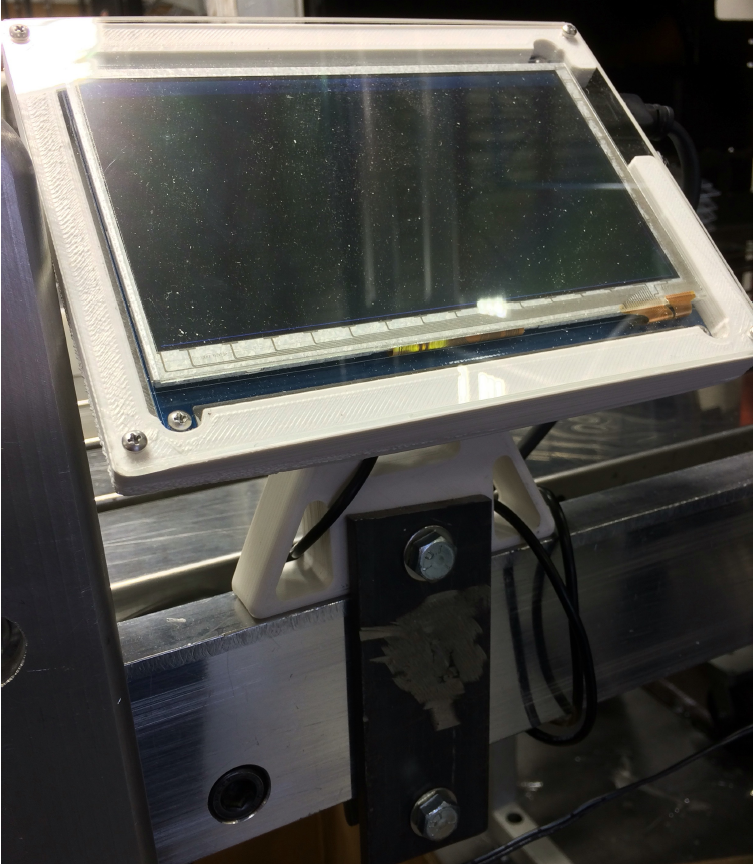
The screen mount for the HDMI display.
Software
The software component for the Thermoforming Line PET Clamshell Counter included two programs.
The part counter script
The part counter set-up program
The part counter script runs on the Raspberry Pi Zero and runs automatically on start up. It is a fairly simple program with a GUI that displays the clamshell count on the HDMI display and changes the colour of the screen to red when it is time for the factory worker to split the clamshell stack. The factory worker splits the stack then presses the button to reset the count.
The part counter set-up program is used by the thermoforming operators to select and load different presets onto the part counter depending on what product is being produced. Presets are stored in a network drive and loaded onto the part counter via the local network.
Both the part counter script and the part counter set-up program can be debugged and modified from the engineering work station via a password protected portal.
Results & Opportunities for Improvement
Ultimately, the Thermoforming Line PET Clamshell Counter prototype that I produced during my 3 month contract with Packright Manufacturing provided a clamshell counting accuracy of 98% and a user friendly experience for factory workers. Some areas of the prototype that could use improvement include
Fabricating an electronics housing and screen mount using 16GA/14GA sheet metal to increase durability
Formalizing a design for the Push Jig and making adjustability easier
Revising the mounting bracket design to use 10GA sheet metal instead of milled aluminum to reduce cost and weight
Switching the material of the upright clamshell alignment surface to UHMW PE plate to reduce cost and the risk of plastic chipping